Automating my website build with Github Actions
I’ve had this website for 6 years now. Like any piece of software, a website needs constant care and things end up breaking if you abandon it. In this post I’ll discuss how I revamped my site and automated my site’s build using Github Actions.
The original setup
I built this website from the beginning with Hugo, which is a very popular static site generator written in Go. I’ve been very happy with it: it’s very easy to setup, it’s fast, and it uses Markdown which is my favorite language for writing.
In Hugo, the content - written in Markdown - is stored under a directory called /content, and the site is compiled under the public directory.
When I originally setup this blog I didn’t have a CI process in place for building it, so I ended up having 2 repositories: one where I kept all the Hugo structure and the content and a separate repository for the published site.
With this approach I had to:
- Build the site (with
hugocommand). - Copy over the contents of the
/publicdirectory to the published site repo. - Commit my changes in both repos.
- Finally, push to Github.
This worked ok for a while, but every article I wanted to write required too many steps, and it quickly got old, resulting in me writing less and less, to the point of abandoning my blog altogether.
Recently, I’ve felt the need to write more, so I decided to fix this issue and revamp my site. My goal was to make so that the publishing process doesn’t get in the way of the writing. From experience I can say tha having a frictionless blogging setup is key to not lose interest in the important part, the writing.
Github Pages
Github Pages is a feature from Github that allows to host a static HTML site under any repository. This is very useful if you want to host the documentation of your project alongside the code, for example.
In the context of Github Pages there are 2 kinds of repos: * Personal or Organization repositories: the name of the repo should be <user-or-org>.github.io. GH Pages sites built from a personal or org repo are published from the master branch by default. * Project repositories: they can have any name. GH Pages sites built from a project repo are published by default from the gh-pages branch.
Given that mine is personal site I created the danvalencia.github.io repo.
Because it’s a personal site, the master branch needs to contain the published site. I created a separate author branch to host the content and I setup this branch as the default branch for the repo, this way when cloning from scratch you’ll be checked out automatically in author.
Ok, so by now, I had my repo with 2 branches: author and master.
Automating the build
Building the site locally is as easy as running:
> hugo
You can install hugo command on a Mac by running brew install hugo.
But how could I run this command automatically on git push ?
Enter Github Actions
I’d heard about Github Actions when it first was released a few months ago, and thought it was a super nice feature which could be used to run your CI pipeline. I figured it would be a good fit for building my site.
Within Github Actions you can create Workflows which are a series of steps that perform several tasks. You can choose to build your own actions or you can choose from existing actions that are published in the Github Marketplace.
Github Actions end up being a combination of a Docker images and scripts that execute within Docker images. The cool thing about this approach is that because it’s Docker based it can contain virtually any base software, and thus you can automate build for any programming stack. I’m not sure about the constraints of storage and memory, though.
Workflow Configuration
Like most configurations nowadays, Github Actions workflows are defined with YAML files you add to your repository’s .github/workflows directory.
A workflow gets triggered by an event, such as a push or pull request creation. In the following example the workflow get’s triggered on a push event from the author branch:
on:
  push:
    branches:
    - author
Then you specify jobs that need to run for this workflow. For each job you specify the docker image to use, like so:
jobs:
  build-deploy:
    runs-on: ubuntu-18.04
Now you specify a list of steps to run, which can be external actions or scripts:
    steps:
    - uses: actions/checkout@v1
      with:
        submodules: true

    - name: Setup Hugo
      uses: peaceiris/actions-hugo@v2
      with:
        hugo-version: '0.59.1'

    - name: Build
      run: hugo --minify

    - name: Deploy
      uses: peaceiris/actions-gh-pages@v2.5.0
      env:
        ACTIONS_DEPLOY_KEY: ${{ secrets.ACTIONS_DEPLOY_KEY }}
        PUBLISH_BRANCH: master
        PUBLISH_DIR: ./public
The steps are mostly self explanatory. In laymans terms:
- Checkout the repo, with submodules.
- Install Hugo version ‘0.59.1’.
- Run the build with
hugo --minify. - Deploy the site by pushing the
./publicdirectory to themasterbranch.
That’s it!
Secrets in Github Actions
One thing I’d like to point out is the use of ${{ secrets.ACTIONS_DEPLOY_KEY }}. As you can probably infer, we’re referencing a secret named ACTIONS_DEPLOY_KEY. But where does this come from, and what is it for, you may ask ?
This is the secret that Github Actions will use to push to a repo. In this case we’re pushing to the current repo, which means that the secret needs to have write permissions to the repo.
How can you create one, you may ask ? Glad you asked:
- First step is to create an SSH key. From a Mac:
ssh-keygen -t rsa -b 4096 -C "youremail@foo.com" -f mysite
This command will create a public and private key pair named mysite.pub and mysite, accordingly. - Copy the private key (e.g.
pbcopy < mysite) and create a secret named ACTIONS_DEPLOY_KEY from the repo’s Settings page: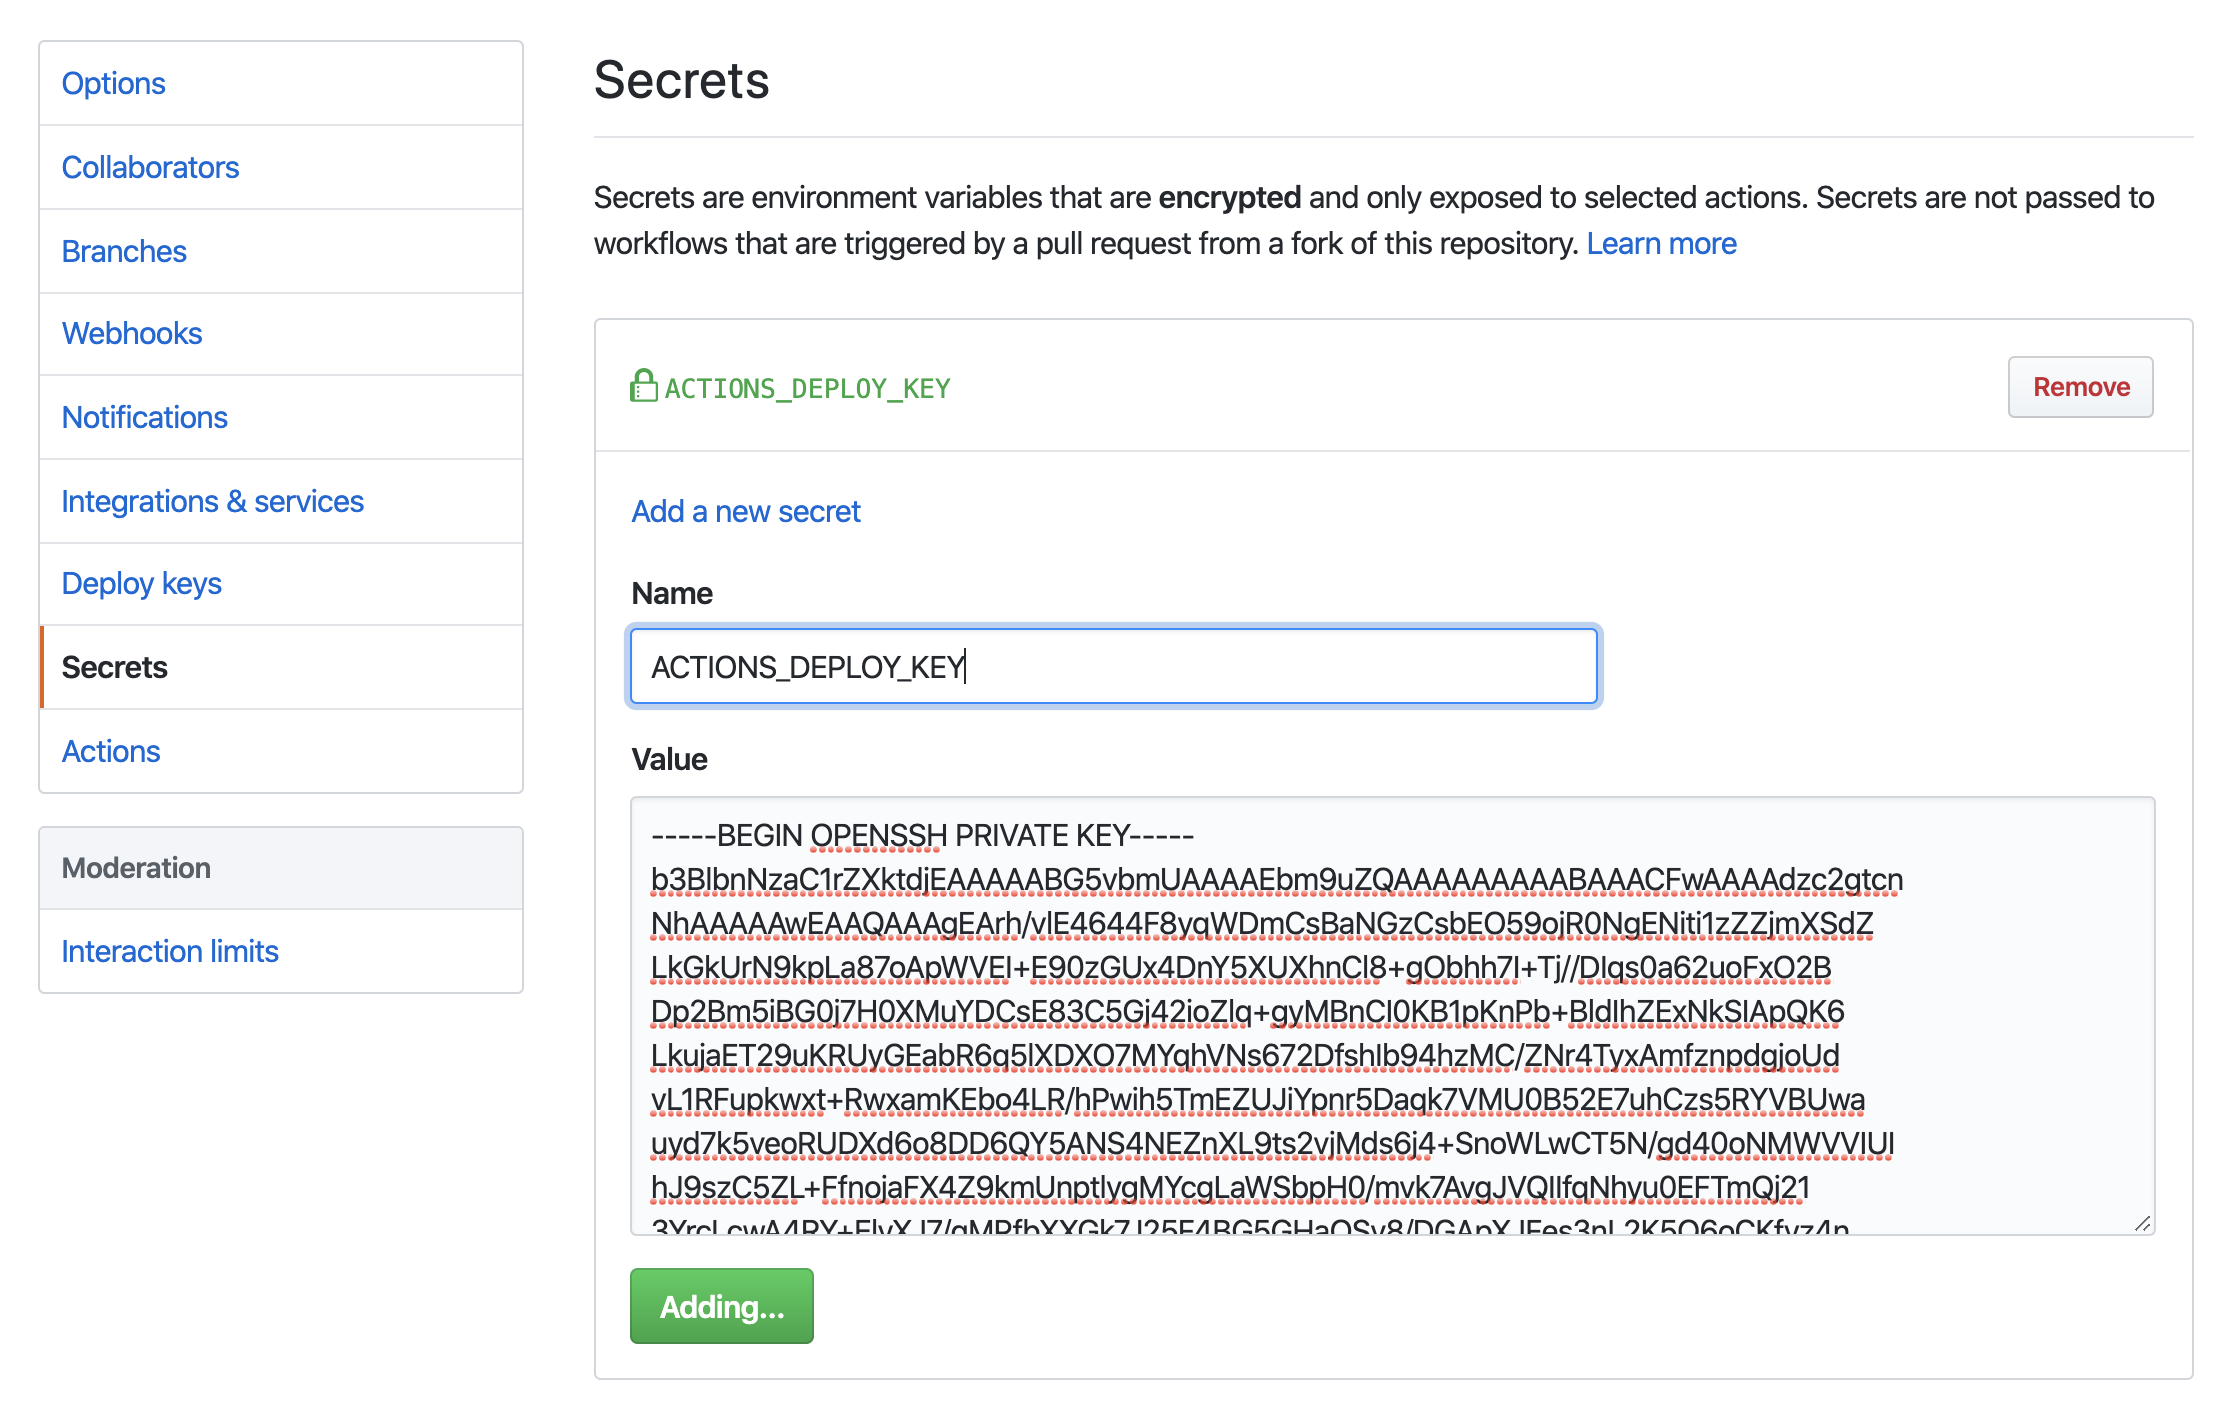
- Copy the public key (e.g.
pbcopy < mysite.pub) and create a deploy key named ACTIONS_DEPLOY_KEY from the repo’s Settings page: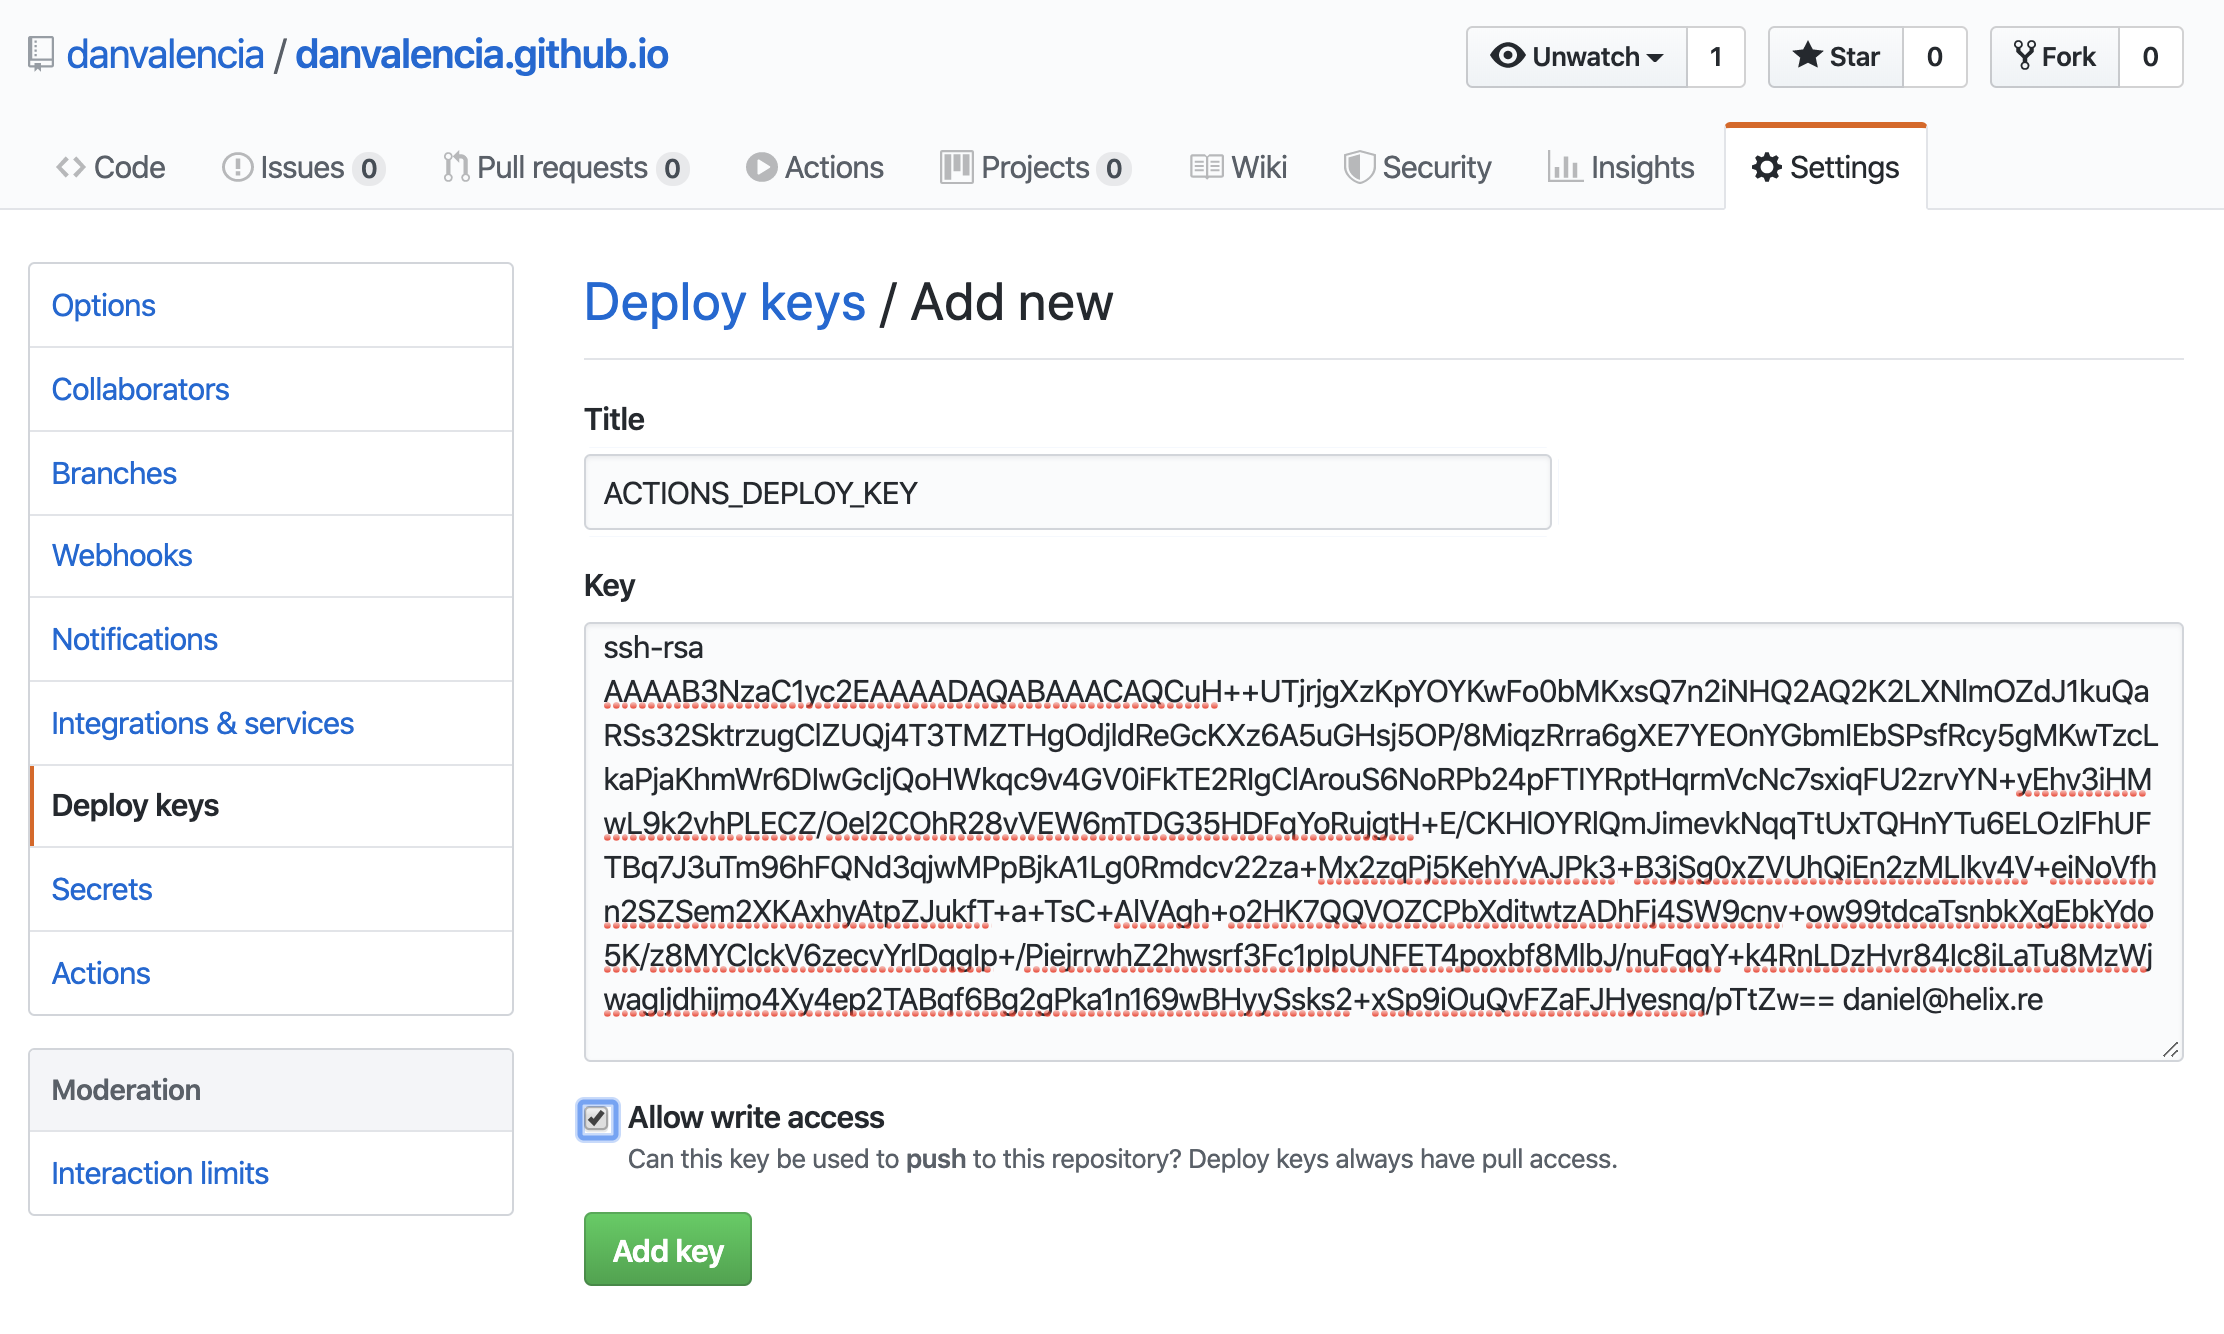
Make sure you check the Allow write access checkbox.- Once the deploy key is created you should be able to use it in Github Actions.
Putting it all together
With Github Actions in place, my writing flow works is now as simple as:
- Create a new article with
hugo new content/articles/my_awesome_new_article.md. - Write the article.
- Commit and push the article:
git add . && git commit -m "My new article" && git push origin author
See it in Action: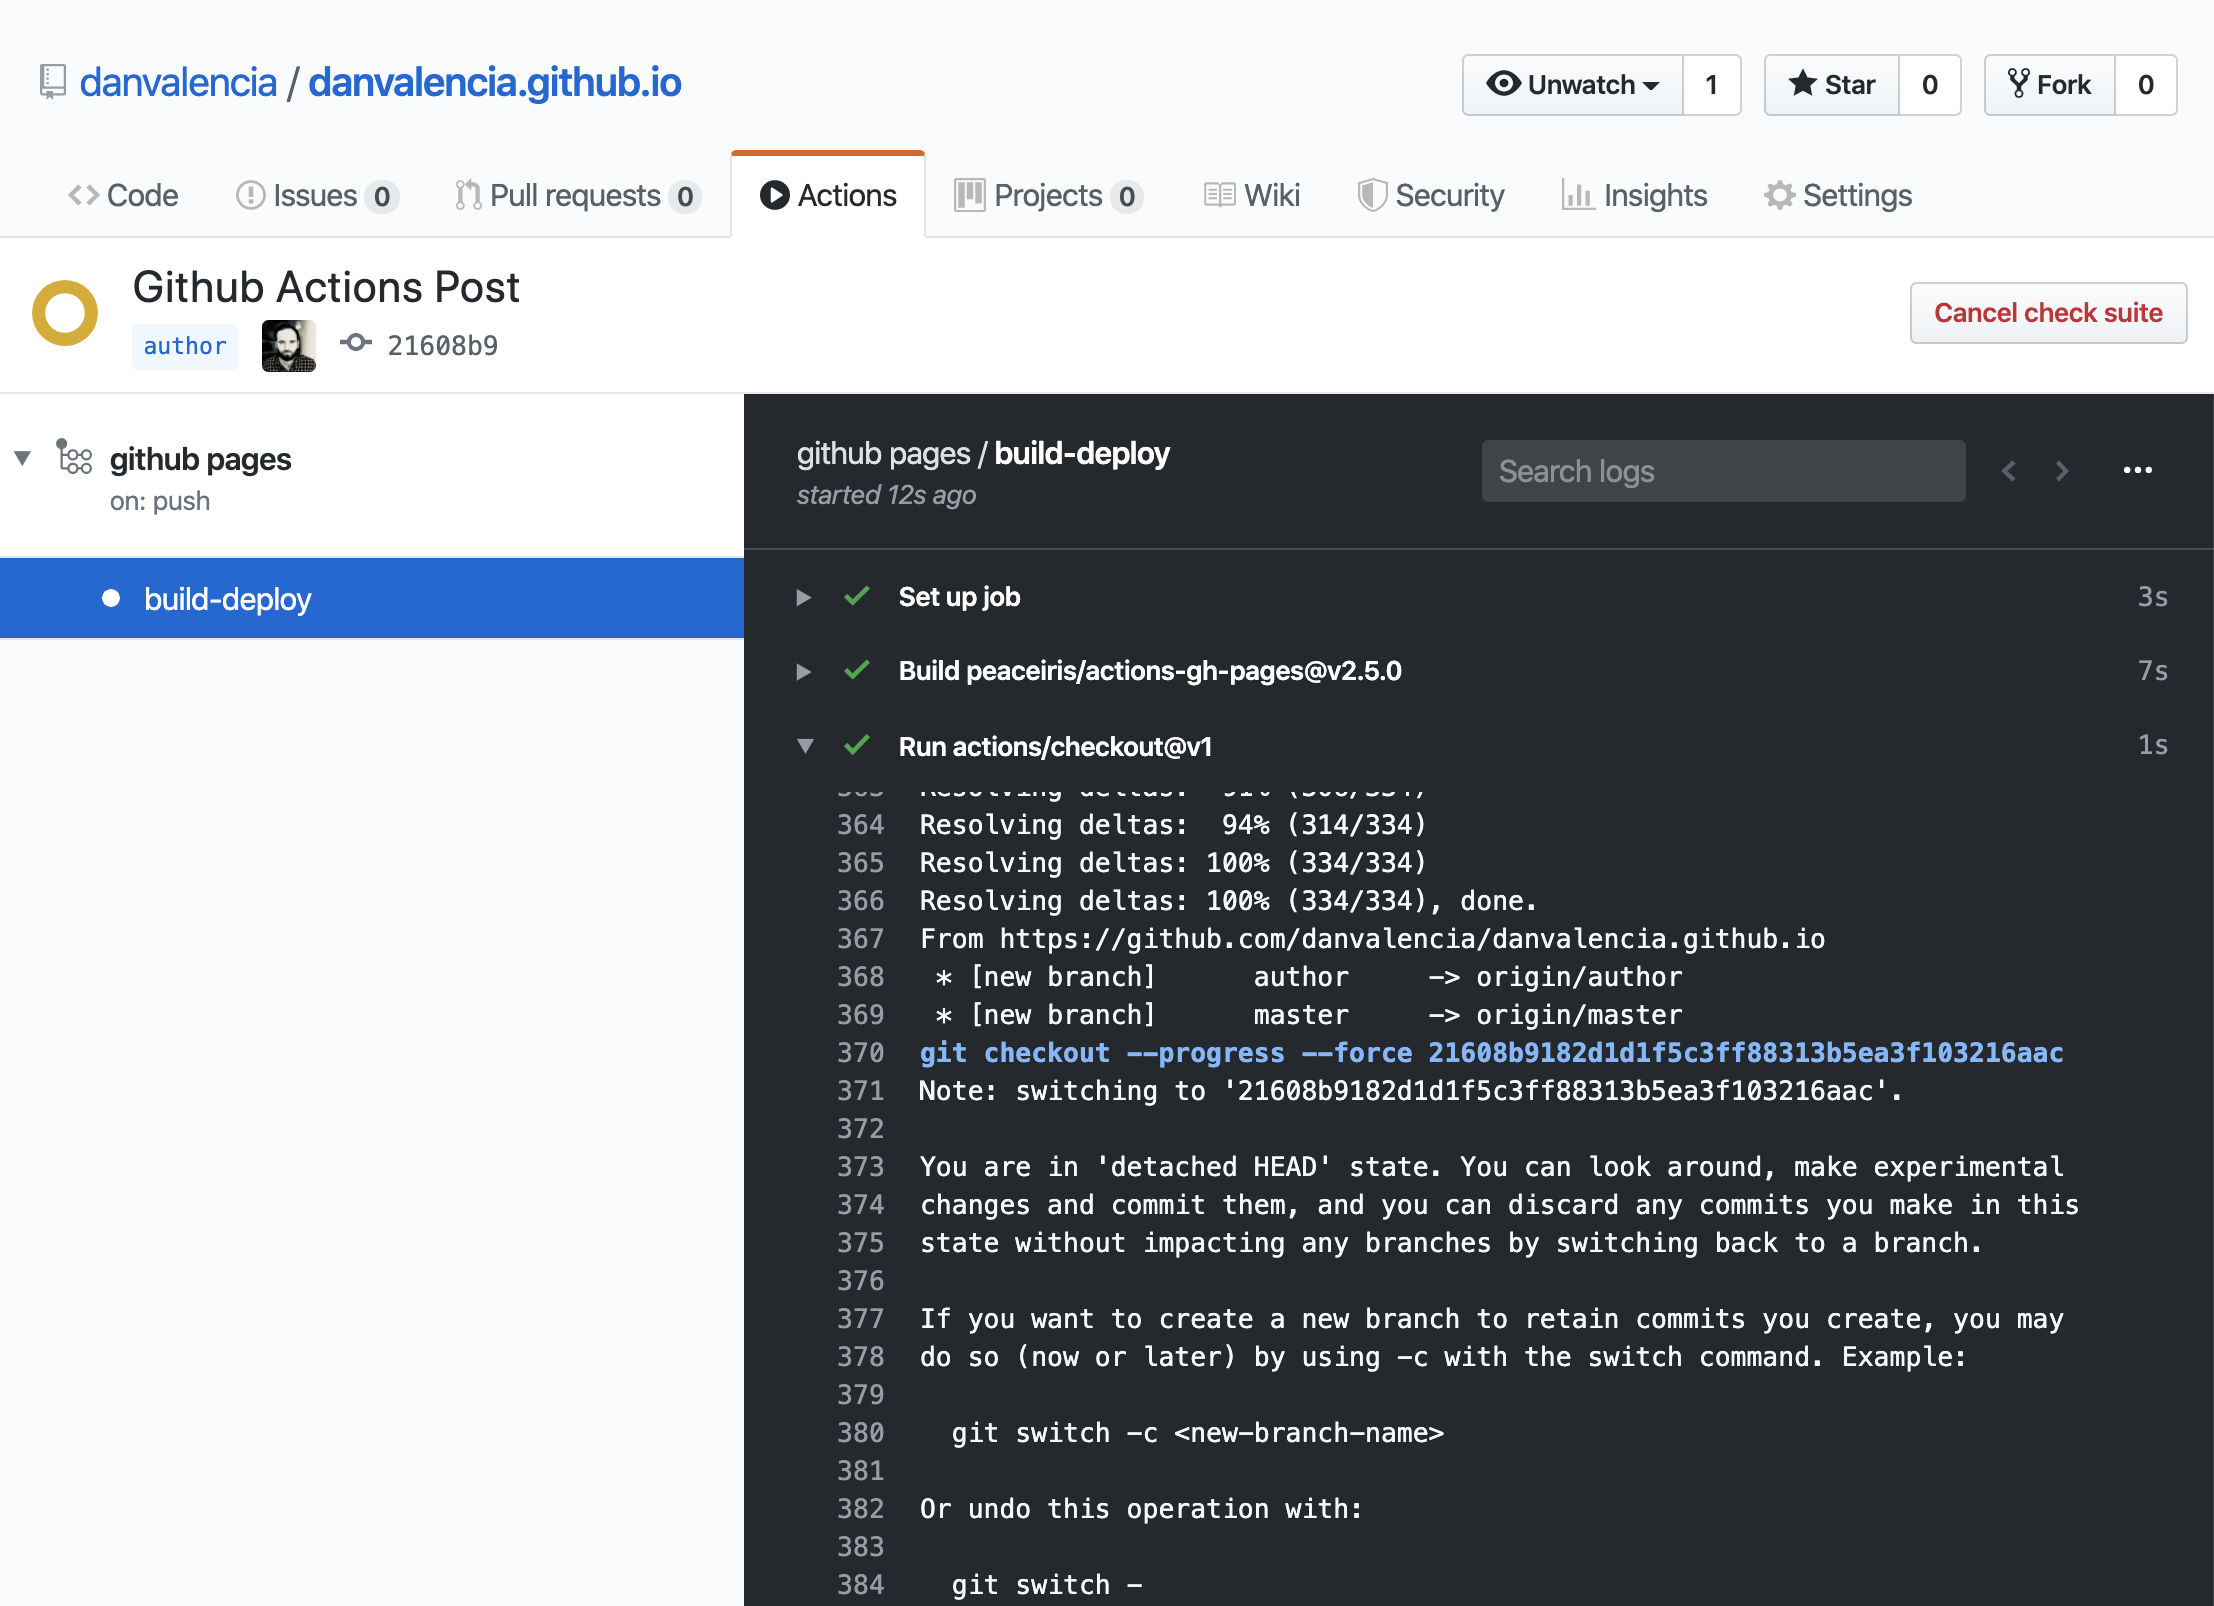
Now I can focus 100% on writing and let Github do the rest!
Thanks for reading!
References
- Hugo Github Action: https://github.com/peaceiris/actions-hugo.